Monday, 30 April 2012

Red and Black check dress


Made this lovely dress using  Simplicity 4384. I just love most simplicity and newlook patterns.


This dress is not lined but finished using bias binding on the neck and armholes, I pleated the skirt instead of flare as on the pattern.  Seeing a trend with pleats??..... Overlocked on the inside.

Bow detail
I wanted to add a little something extra, was going to add two bows each at same place but got lazy and stuck with one. ha.


I do love taking pictures and toys but I like mummy's phone better. 


...And this is the back view, do you think its nice?

I'm very lucky that this dresses lines up. In fact I don't think in sewing one runs into the kind of luck I ran into by the dresses lining up. (normally if something could go wrong it does !) I completely forgot to watch out for the strips and make sure they lined up when cutting, was already joining seams when i remembered screamed, and checked...
...it all lined up. (almost lol)


Mummy's dresses are better than buying from shops, yippee!!
I do really hope.
Until next time, Adois.


Sunday, 29 April 2012

White dress with wine bow

Simple n bold
I am in love with bows and flowers in case you haven't noticed.
I also love simplicity, that was why i decided on this simple but bold dress.

Original creation
I originally added the button row in the middle but that design lasted about 15minutes!!!  The girls ripped it off!
So I decided to just leave that feature out. Or do you think I should have put it back, more securely?


Makes funny faces when taking pictures.

This dress is similar to Z & E denim dress  and another version is Here.

I seem to fancy a-line dresses, lol. Anyway I am planning a summer coat for the girls and its also going to be an a-line design. I am really looking forward to it.

Hope you enjoyed reading. Nice to have you here.
Adios.


Sunday, 22 April 2012

Green and Gold Dress


Saw this fabric in the shops and fell in love with it. Seems a bit dull so I decided to mix it up with some gold. Mixing up fabric is well up my street as you will notice soon. :-) The fabric does fray a bit (as in a lot) so I've had to overlock every bit of the inside.

 Can the see the gold 'infuse' on the sleeve? Copied the idea from a vogue pattern, would have added pictures but can't seem to find pattern image on their site anymore. The sun is making the fabric look faded, it does look better in real life.


Newlook pattern 6824 used. Bit of a mix and match of the princess seam, gathered sleeve detail and sash.


Back pleat detail.

Notice the 'look' of the back? That was also from another vogue pattern which has pleats at the skirt back edgestitched for about 5" in length only. This design is not so obvious from a distance due to the fabric pattern.

Don't ask me why i am wearing boots on a seemingly sunny day. lol
When I checked the weather forecast before leaving home it was supposed to be a cold day. As the day wore on, the sun came out and it got warmer. How embarrassing to be in such hot boots. lol


 Overall I am very happy with this dress, it took two days and was very uneventful. (isn't that what we always want.) I.e things went smoothly just as predicted. Well except for one little detail. I wanted full long sleeves with this dress, assumed pattern piece was, joined sleeves to bodice only to find out it was 3/4 in length, ha aha, but it still looked good.

Until the next inspiration, the next creation...
Adios.

Wednesday, 11 April 2012

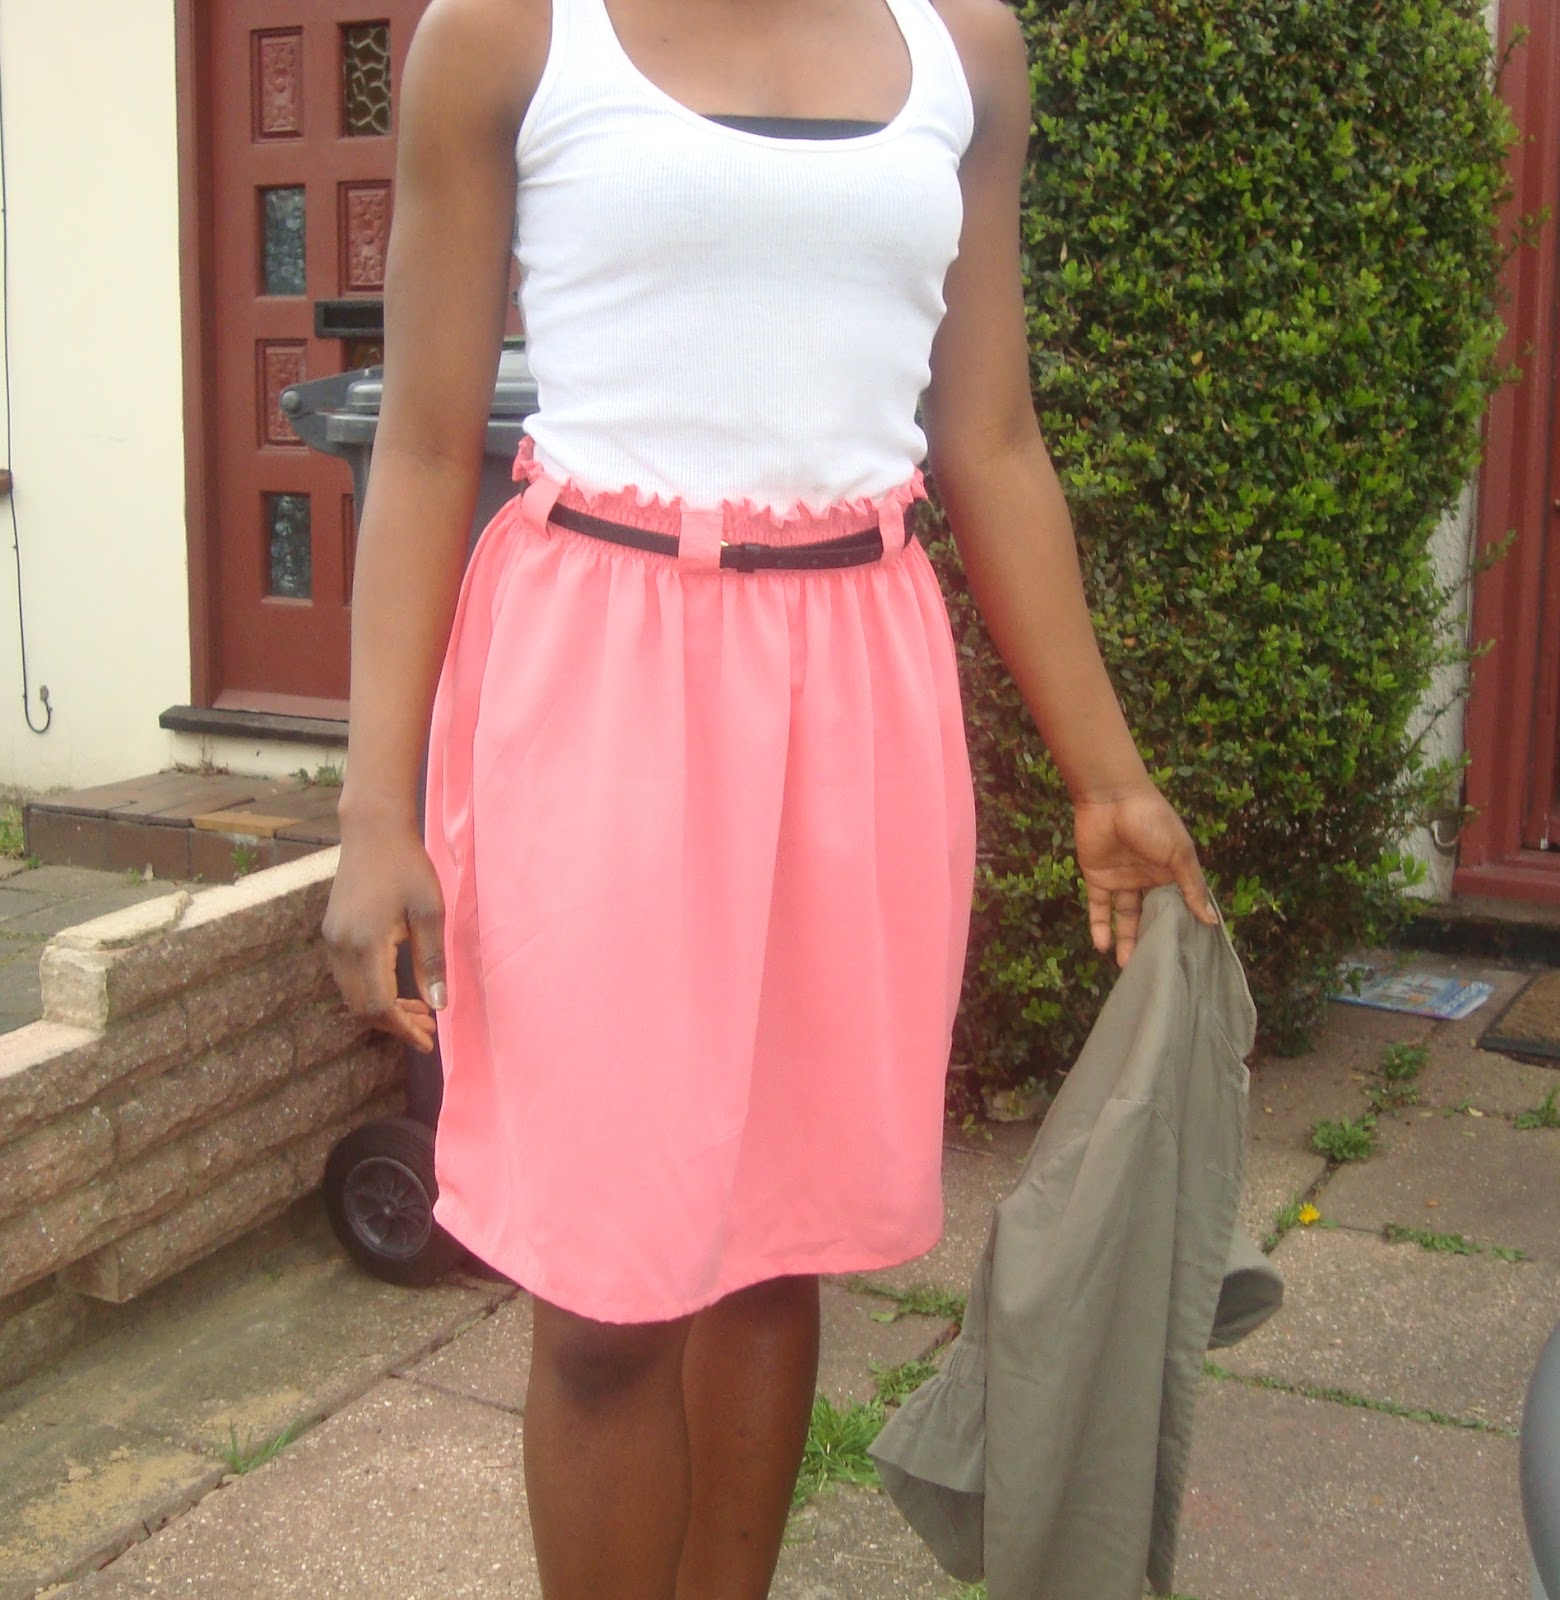
The Shirred Skirt (with tutorial)


My sister showed me the picture of a skirt she saw in an online clothing store, and she wanted me to make one for her.


Blue (Blue) Blue Paperbag Mini Skirt | 245086640 | New Look
Original Skirt from store.


I would rather refer to it has the shirred skirt.
The skirt is made with light to medium weight  shirred at the waist, with belt loops for a belt to hold the skirt firmly to the waist.
it looks pretty simple to make, made the skirt in about one hour and the belt loops took about 45 mins. this will be included as part of my 'Easy fixes' and I will be showing you how to make one.


Measure your waist and cut 2x of your measurement as the width
Decide how long you want the length to be and add 3inch the length. (1.5" for hemming on top and 1.5" for hemming the bottom)
for illustration purposes. the measured waist was 30" (76cm) and desired length was 20" (51cm)
so i cut out two pieces of fabric width 30" and length 23" (59cm)


Hem both pieces at top of skirt only
Change the bobbin thread for a shirred elastic thread. (without any extra pressure or pull, wrap the elastic thread on to the bobbin and return in the machine.)
Sew as normal. although I increased the pressure of machine by one digit i.e from a 3 to a 4
Make 5 rows of shirring with 0.5"  (1cm) spacing between each row.


 Remembering to lock the stitches at the start and end of each row. At the end of each row, I lock stitch, lift up presser foot, turn fabric in other direction and kept sewing.

Join the fabric pieces together at the sides.

Hem the bottom of the skirt. (I finished the insides with an overlocker, you could use bias binding, pinking shears.. to finish)


Next is belt loops.
Cut a strip of fabric about 2" wide and 18" long.
Finish the sides eg pinking shears ( i overlocked) fold in both sides, Iron and sew to secure


Measure about 2.5" and out out 6 pieces.


 The tips are folded and this is then attached to skirt at the two edges to secure in place.


Your skirt is ready

Just don't miss out a belt loop as she did.
She decided she would rather use a purchased belt with this skirt, its up to you however if you want to make the accompanying fabric belt :)

Until something else interesting comes up, Adios.

Ever so grateful you came, hoping you learnt a thing or two. ha.